Monday, February 22, 2010

Flourishes is in the Stamp It Cards Spotlight!


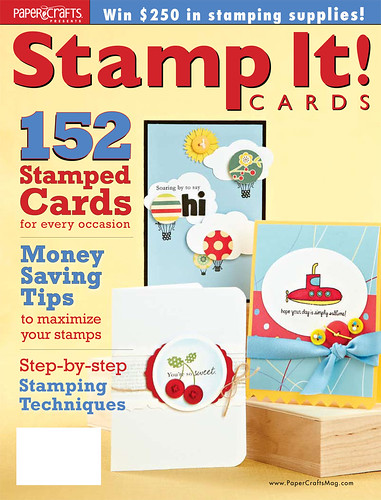
If you've picked up Paper Crafts' new Stamp It Cards issue, you might have spotted a few Flourishes beauties on the pages inside! Former Friends of Flourishes team member Kimberly Crawford has two gorgeous creations using our Cherries and Peaches set as well as our Life, Love and Lemons set(Pages 17 & 19)! To celebrate the new issue, the magazine is shining the spotlight on some of their contributors. Today it's Kimberly's turn! Head on over to Paper Crafts Connection to see her fabulous creation and you'll have a shot at winning one of the three Cherries and Peaches stamp sets they are giving away!

Sunday, February 21, 2010

Ready for Spring

Wow, the snow has been crazy here on Long Island and now that it's starting to melt it's all a huge mess! I am so ready for the spring-which is was inspired this set that I created for this weeks Limelight design.


I started by altering a plain lined notebook with a piece of paper from Imaginisce. I used some luscious purple silk ribbon which matched wonderfully with the purple Prism cardstock I used to mat all of my images. The images are all from the set Sweet Violets. I used the larger image for both the center of the journal and the bookmark and the smaller image for the plant marker. All are stamped on Flourishes white card stock and colored with Copic markers. On both larger images I used a touch of purple and green Stickels for a tiny bit of sparkle and depth and shaded around the images with Prismacolor pencils and odorless mineral spirits. They were all cut out using Nestabilities dies and inked around the edges with Distress Ink in Antique Linen.


Here is a close up of the front cover. The dp has a faded script design running across it giving it an aged feel. I stamped and cutout an additional leaf and used it and buttons to adorn a computer generate label I made for the journal. You can also see some of the sparkle at this angle.


This is the plant marker I created. I used a craft stick that I stamped violets onto. I knew that bag of craft sticks would come in handy some day! I'd better start making more markers...


And finally I created a bookmark to keep my place in my journal just in case my dirty fingerprints don't show me the way ;) Again I used that luxurious silk ribbon! Ooh, I love this stuff! It makes the most stunning bows too!

Grouped together this makes a wonderful gift set...and I have a wonderful neighbor this would be perfect for, unless of course I keep it for myself, lol! Have a great weekend!

Friday, February 19, 2010

Our Web Store Is Getting A Facelift!

It's been months in the making, and now, we're about to show you our new home on the web! Flourishes.org is getting a facelift!

What does that mean for you the customer? Our store will be down for up to 48 hours as we transfer inventory and put the final touches into play. We will reopen for our Grand Opening on Monday, February 22nd. Get ready for a whole new shopping experience that comes complete with a brand new gallery for inspiration, a tutorial library and more!

See you Monday at....
www.flourishes.org

Thursday, February 18, 2010

Copic Extras!

You have all those delicious Copic Collections in the container, now how about learning some new ways to use them?

Hi it's Christine here with you today.  I thought it would be fun to give you some new ideas for how to use your Copics today.  Some you may have seen, and some that might be new to you.  I'll be showing you 4 different techniques with Copics today so hang on....it's a long post :)

The Colorless Blender Pen

This is one fantastic little essential in EVERY Copic owners Collection.  When I look at it - it's really not a blending tool, per say...but more-so a color remover.  And when you think of it that way, it has SO many applications.  You probably all know that it can remove ink you've "spread too far over the edges", but it can also add details into your design where you want them.

Below is a cute little purse image from the Think Pink - Fight Like a Girl set.  It's a good example for this technique because it has some open space.  I colored it with the Tea Rose Copic Collection from the store on our Flourishes Classic White paper - specifically designed for use with Copics. 


Then all you need to do use use your blender pen (in this case with the smaller tip, we have two styles in the store) and go over the spaces in your colored image that you want to lighten or make white.  So you can see I added polka-dots to my purse.  I ended up making the dots by dotting down my pen several times on each dot to get the lightness/whiteness I desired.  You could make stripes, plaid, dots, or squiggles - anything your heart desires just with your blender pen!


And here's the final creation, I also used the Scalloped Squares Nestabilities, Octagonal Nestabilities and the Fancy Scalloped Pierceabilities for the edging on the Basic Grey Lemonade designer paper.


Copic Pointillism

When I was in High School we learned a technique with a fine point black marker called Pointillism.  You create depth, light and shadow in your design by making fine even dots with your black pen.  That same technique can be applied to copic markers with a light hand as well, and the way Flourishes sells the Collections in the store is just perfect for this technique.  I started with the Spring Greens Collection and the very fun tree and swing in the Swing Set .  Initially you add dots randomly to the design in areas that you want the lightest colors to show.  I work from lightest to darkest.   Remember light advances, dark receeds.


Then I add the next color in the collection in the areas I want to see more depth or shadow.  You have to imagine a tree and how the leaves look from a distance, almost like large round or ovals balls on the tree. 


Here below I've added the darkest color dots in the deepest areas.


And here it is after I've gone back and added some more YG00 for  a softer look. 


And below the final card, on it I used Silk Ribbon from the Flourishes store, as well as Pinking Edge Nestabilities.


Dirty Rag

No I didn't name this technique myself :)  But it is a technique where you will need an old rag that has some texture that you don't mind getting dirty.

First I colored this t-shirt from Think Pink - Fight Like a Girl with the Hollyhock Collection.  I knew I would be cutting it out for my design so I added lots of color and let it bleed out of the lines. 


Then I used these supplies below: blending solution (essentially what you would use to refill your blender pen - I got it at my Copic Certification course, but I know retailers sell it) and my rag.  I chose an old washcloth because of the texture, so whatever type of rag you use will give you a different effect. 


What you want to do then is dampen a corner of the rag with blending solution and then dab lightly over your colored image.  The blending solution will "remove" color from your image in the texture pattern on the rag.  I did this several times to get the effect I wanted.  It is very subtle but adds the feeling of texture, or in this case almost the feeling of a tie-dyed shirt.


And here's the card I also used Basic Grey 1/2 Pearls from the Flourishes store


And lastly:

Adding Pattern with Stamps

In this technique you use a similar idea to what I just showed you in the Dirty Rag technique, but you implement it with rubber stamps.  I'll be creating a crushed patterned velvet look.  Here's how it works. I've colored this gorgeous chair from the set Chairs to You with the Azure Collection.  ONLY color in those areas that you want pattern first.  Leave the rest uncolored. 


Next you will need Blender Solution, a sponge (this one was just stained - not dirty - you need it to be clean), and a RUBBER stamp background, here is an old SU - Paisley Background


Make sure that your background is very clean when you do this technique, I didn't recheck my background and you'll see what happened below.  Add some blending solution lightly to the sponge to make it damp - not wet, and then dab the solution on the background stamp in an area large enough to cover your colored area, it need to be damp - not drippy on the background stamp.  Place the background stamp over top of your image and press - just as if you were stamping.  Lift and voila.....you have the look of crushed velvet.  You can see in the background that because I didn't clean my background stamp well enough it also stamped on the white.  So I had to do some creative cutting to make it work.  So - learn from my mistakes - clean your stamp well :)  But you know that mistakes are opportunities for embellishment right?  :)

Now - I know all of you are going to ask me a question, can I get this effect with acrylic stamps?  The answer - I'm not sure.  Because Blender Solution is alcohol based I'd be concerned with what it would do to my polymer stamps....and I'm not willing to sacrifice one to try!  So, if you're brave enough let me know! 


And here's the card.


So...four new techniques with Copics to try!  I hope you have fun experimenting with these techniques. 

Wednesday, February 17, 2010

Just in case you missed it! ;-)

Hi all and Happy Wednesday. Julie here! Recently, Flourishes pulled the lid off it's February release and one of the stamps-- Tea Rose Background -- is a brand new background that is just too elegant and feminine.

Because of it's unusual shape, I recently did a tutorial on my blog on how to use it. I thought we'd showcase that "how to" here... just in case you missed it! First things first, here's a peek at what the stamp looks like on the block. See the criss cross pattern?


After inking it up with black ink, this is how it stamps....

The fun thing is, once you line the tea rose background up, you get a pattern that could repeat from here to eternity!
And, after lining it up and stamping, then the fun begins with coloring and creating! Here's a peek at my finished card.I also used elements from the new Let's have Tea set! If you'd like to know more about the card mechanics, you can click HERE to see.

Remember, Flourishes New Release Bundle featuring all four stamp sets is on special for one more day only! This bundle combines all four sets into one package price which is 10% less than if you were to buy each set individually! Great deal!
Thanks for stopping by! We'll see you back here soon!

Monday, February 15, 2010

Flourishes Timeless Tuesday Challenge (FTTC54)!


It is time for Flourishes Timeless Tuesday Challenge(FTTC54)! Thanks so much for playing along with us last week in the easel card challenge! 

This week Dee Jackson is our host! Dee is challenging us to " All About Me". Use what you love and what makes you happy!! Use your favorite colors, stamps, layout, and embellishments! Whatever ROCKS your world! We would love to see what you create!


Let's go check out what Dee created with the "All About Me" challenge!


Dee is using Sweet Violets and Waterlilies stamp sets.  Dee used Flourishes Classic White cardstock.   She colored the image using Flourishes Copic Color Collection in Crocus, Lilac, and Evergreen.   I love her fancy punched border frame accenting the deeply rich colored waterlily.  Some cut work detailing and dimension makes everything just pop!  She layered the waterlily with some basicgray dp, added a piece of sheer ribbon, and a metallic cording bow,  and this gorgeous card was complete.    Beautifully done, Dee! 


Check out the other FOF blog team designers to see what they made with the "All About Me"  challenge!


 Cindy HaffnerBetty WrightDee Jackson
Silke LedlowMaki Jones, and Barbara Anders


FTTC53 Winner!
Chosen by Random Integer Generator

Here are your random numbers: 9
Timestamp: 2010-02-16 01:00:32 UTC
Congratulations, Jackie!!!

m&m'sgrandma

Please pm me at SCS under gbedwright for your coupon code!


The Friends of Flourishes blog design team are bringing you exciting and different challenges each week. Everyone can PLAY and anyone can WIN! Each week Flourishes gives away a store gift certificate for $10 to the lucky random draw participant. In addition to this, Flourishes also gives away a random monthly gift certificate for $10 to one lucky monthly challenge winner. So, if you did not get a chance to finish all of the challenges during the month, you still have a chance to win. Just link your card with Mr. Linky for each challenge completed! We also have the Flourishes Timeless Tuesday blog button to sport on your blog!  If you need the code, check here.


Now, it is your turn to play! Here is what you need to know!

  • Anyone can play whether you have Flourishes stamps or not. Of course, if you have Flourishes stamps, by all means, use them.
  • Use keyword code FTTC54 when linking to SCS or public gallery.
  • Be sure to use the Mr. Linky to be eligible for the gift certificate drawing!
  • If you use either your blog link or online gallery, please give an active Flourishes Blog link.
  • By all means combine this challenge with other blog challenges.
  • The challenge runs from Tuesday, 12:01 am until Monday at 6 pm EST
  • Enjoy yourself!!!


As always, thanks so much for stopping by and playing Flourishes Timeless Tuesday Challenge with us! Your comments are always greatly appreciated!


Your Flourishes Friends!

A New & Talented Designer on our Team!

A few months back, we lost a very talented designer -- Faith Hofrichter -- as she decided to break out on her own and open her own web store. The thought of adding a new face to the team was difficult. We have such a talented and great group of ladies, how do you ever really replace them? Well, it was tough and you can say I took my sweet time! But, after searching far and wide, my eyes landed on one lady's blog and I kept coming back for more! Eventually, we took a leap and asked this fine designer to join us! And guess what? She said YES!

So, without further ado, meet......

When you visit Dawn's blog, My Stamping Thyme, it's like one big dose of "happy!" She loves cheerful colors and often uses fun embellishments that literally make you smile. You should pay her a visit! She also has amazing coloring skills, and that's what drew me in time and time again!

In preparation for her big reveal, we asked her to grab one of her favorite Flourishes sets and make a card. She whipped up this cheery Strawberries creation using a mix of Prismacolor Pencils and Copic markers. Isn't it just darling?

We also asked Dawn to share a few thoughts and a little bit about herself too!

Hello everyone.. I am Dawn Burnworth and I am so excited to be joining this amazing design team. I have admired their work and creativity here at Flourishes.

I have always been a crafty girl.. I grew up in northern Illinois in a large family. I started out sewing one summer with my aunt.. She was such a huge influence in my life. I got so homesick and she was trying to keep my mind busy. I still find that when I am really stressed that a crafty type project eases my mind. She planted a seed in me that has been an important part of who I am.

I have a wonderfully supportive husband that puts up with my crafty "needs" and 5 great kids. I started stamping about 5 years ago. I remember uploading my first card to a challenge and how nervous I was. I have learned so much from all of the amazing talent out there.

I look forward to creating with the rest of the team and I am so happy to be stamping with Flourishes terrific stamps and thank you for this opportunity.


Thanks Dawn! We know it's going to be a fun ride and a blast getting to know you better!

Before we go, we wanted to share a darling card from one of our past DT members, Susan Roberts! She pulled out all the stops to make this footloose and fancy free card just in time for Mardi Gras!!!


Susan's fun-filled card uses Flourishes Mardi Gras set! If you want to know more about this creation, just pay Susan a visit HERE.

Thanks for stopping by everyone! Betty and the gals will be back soon for another Timeless Tuesday Challenge!!

~Julie