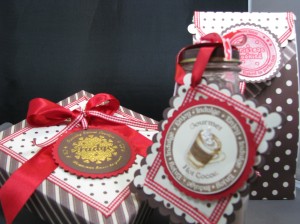
So here is my finished product:

Here are the elements that I started with to make the project. These very simple items were turned into Cinderella like articles once they were treated to a bit of TLC.

1-The candy box was a very nice one that last year I emptied onto a plate and put the box away for a future project.
2 The glass bottle was as I said yesterday generously and willing donated by my husband that will use any excuse to guzzle a Starbucks cold.
3.The bag is a new product that will soon be on the shelves at Flourishes. The generous bag is approximately 4" X 9" with a fold down reclosable top. It is lined and food safe and will prove to be a wonderful way to share your wonderful creations with family and friends.
THE FUDGE BOX TAG:
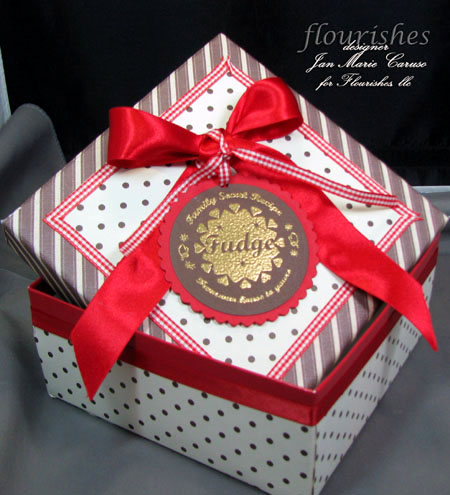
Here is a close up of the tag and box.

THE DETAIL MAKE IT SPECIAL!
This Picture shows a lot of the detains in the box. After convering the box. I added some extra details to make it even more special...I'm just a detail kind of girl..LOL. If you look closely at the bottom part of the box you will notice that where the DP and box come together I added a 1/4" red satin ribbon to finish the edges. I really think that our mechanics in a project need to be hidden and this is a easy way to do this. I simply used the double stick tape in the 1/8" size along the joining edge then removed the paper side one side at a time and was very careful to kept a straight line. The is really and easy task with the Sookwang tape. I got this from Diana at Scor Pal and just LOVE the stuff......I have it in most of the sizes. Living in Florida where the humidity is a problem I really want my project to stay together and this tape is the answer. Next I added red and white gingham ribbon to the top where the edges of the paper came together.
The TAG: Using the Baking set and and additional 2 5/8" wood mount for this set I was ready for the task at hand:

...I wanted a very rich luscious look so I choose to ink up the JustRite image and wording ring with my encore gold ink and then added SU Gold Glory embossing powder. To cut the image, I used my Nestabilities in both the plain circle and scallops.

This picture shows you the cuts I made, with the exception of the Chocolate Chip circle used for the box. I used the very same sizes on each of the the tags just varying the colors, theme, and styles of tags....but each one has a circle tag from which I proceeded.
After embossing the image I layered it on to the Chocolate Chip and now doesn't it look quite professional?
 I added a 1" red satin ribbon and tied it all together with the red and white gingham. I was pleased so far.
THE GOURMET COCOA MIX TAG
This was oh so easy

I used these Copic markers to color the tag which had been stamped onto Very Vanilla using Hybrid Palette Burnt Umber.

As you can see very little was done to enhance this tag. Simple coloring with the Copics and blender, a dab of the Liquid Pearls to make the whipped dream stand tall with peaks and this part of the tag was done. Because this was going to hang on the bottle it needed a little umph. With that in mind I added two layers, one in Chocolate Chip cardstock and a slightly smaller in the DP, both were cut with the rectangle Nesties. The pieces were all attached and I punched a small hole in the corner and ran a small red satin ribbon thru and placed it on the bottle.
THE COOKIE BAG:

How to impress your Family & Friends! This will be an easy way using the new soon to be available bag at Flourishes. It is an undiscoverd beauty just sitting there ready to be dressed up and given away. It is a food safe bag, but don't limit yourself to food with this great little treasure. To dress up this bag--a soon to be Cinderella, I measured the bag for length and width and cut two strips of DP paper to fit. These were attached to the bag with Sookwang tape. Before attaching the back strip I made my front flap on which the cookie detail was adhered. Now for a little deception, the bottom striped" flap" is made from the striped paper that was left over from covering the top of the fudge box. I simply trimmed it to size and attached it to the front of the bag. It will not move. The dotted flap/tag (this does actually flap from the back to the front of the bag) was cut using a square scallop Nesties in Very Vanilla and just a little over half of the actual size of the square. The scallop tag was attached to the back of the bag, then the second brown dotted strip was taped and attached to cover the mechanics on the back of the bag. The front of the flap of vanilla dotted DP was finished off using the same edge treatment as I used in the entire process. I made my tag stamping on Real Red using SU Craft Vanilla ink...still not a good photo. The scallop next layer has a simple dot in each scallop, then a second scallop, this time in Chocolate Chip was layered. Between the layers I hid my two streamers of the red and white gingham.
VIOLA! There are the details of this fun set. Now I am going to challenge you to make some of your own and share them with me. I want to see your version of these packages. Don't have the new JustRite items....no problem, just click HERE , you will be at the Stampers Toys, in the Flourishes store. There we have a great selection of JustRite products.
Thanks for looking over my shoulder today. I really appreciate it that you took the time from your busy schedule to share the moments and projects of today. I hope you enjoyed the details in these projects.
Ciao,


1 comment:
Jan Marie this is awesome, thank you for showing us the start of this wonderful gift set. I am going to be looking foward to those bags!
Post a Comment