
And to make it extra special I have three cards, each at a different level of work. I know that when making Christmas cards we need some that are quick and easy, some with just a touch more, and then that extra special card where we go the extra mile.
This is the first one and it is very simple, but still has elegance and a truly grand feeling about it.
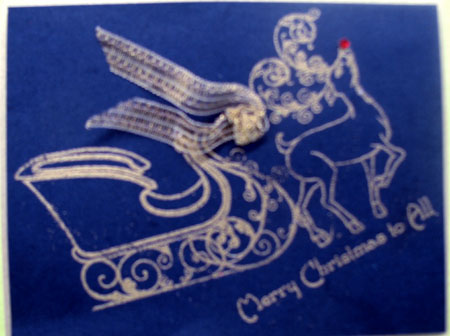
For this card I used Blue Metallic Papers in the Gold Leaf Metallic, both from Flourishes. I used my trusty embossing buddy to swipe the page so I would not have any stray embossing powder . A tiny piece of gold wired ribbon adds some depth and texture. One of the tinest Red Kaiser Rhinestones set Rudolph's nose aglow. To make up this card I cut a standard A2 size piece of Gold Leaf Metallic paper and the card was cut 1/4" smaller, folded and scored with the Teflon Bone--a stampers essential in my opinion. The card was adhered together and Viola it was done. Simple, Easy, Elegant!
My second card is using only the sleigh from the set. For this card I colored it with my Prisma pencils and blender pen. I wanted a deckle edge at the bottom so a torn piece of Red cardstock was readied for the occasion. The cardstock that I am using for this card is core colored so I did not have to be careful which direction I pulled it. Lots of very expensive cards have deckle edges.
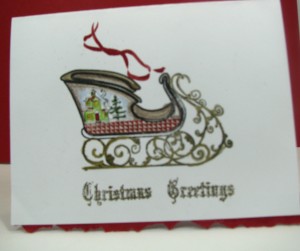 The image was stamped with Hybrid Palette Ink-Noir from Flourishes. These inks have turned into my personal favorite. They are permanent so I can watercolor, use my Copics and gamsol with not worries or fears of bleeding or smudging.
I also love this little checkered panel that you can add to the bottom of the sleigh. Living in the Alps of Germany made me aware of the beautiful scenes that are put on their sleighs. This one uses one of the 3 scenes that are in the set so you can create your own personalized sleigh. I LOVE those reins in bright red....it also carried the red deckle edge at the bottom. I choose a greeting from the set as well and embossed in itn gold...Another Viola!
For my third card today, I went all out. as you will see. I have used the Spruce Tree from Forest of Trees Stamp Set.
The tree
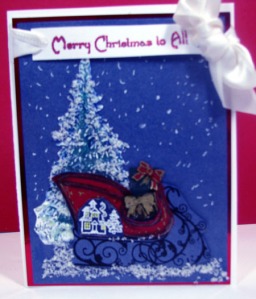 was stamped in Hunter Green ink on White cardstock. I carefully cut it out and smudged the edges with navy ink. Next I used a long tooth pick to add Flower Soft Glue to the edges and center of the tree. I applied Ivory Flower Soft to create my snow and set it aside to dry. For the card itself I used white cardstock as the base and a mirrored red metallic cardstock (I found at Michaels and bought the only 2 packs I could find). The next layer is again the Blue Metallic Cardstock from Flourishes. T cut the white, folded it, and scored it with my Teflon Bone folder for the crisp edge I love. I stamped the sleigh with Versamark then embossed with black detail embossing powder. I cut it out and set it aside as I worked on the rest. I used a small piece of the same Blue Metallic cardstock, and the house image which I inked with Versamark and white detail embossing powder. Next I used my Prisma colored pencils and added some lights in the house. It is hard to see in this picture but I added some glitter with my Saukara Glitter pen (another must have for stampers and scrapbookers) on the smoke coming from the chimney. The next step was to stamp the sleigh image again this time on the new Glittering Red card stock that we had made just for Flourishes. This photo does not do it justice at all. I stamped it in black, then smudged it with some black on the edges to give it some depth. I carefully cut it apart and layered in on to the blue sleigh. Next I adhered the small house scene. The packages were made using the present stamps from O Christmas tree. They were just the right size. I added snow using the Flower Soft and I was just about finished, but not quiet the Viola! yet. I stamped the sentiment from the newly released Holiday Sentiments stamp set with Versamark and used some sparkle red embossing powder. The beautiful white satin May Arts ribbon from Flourishes was the crowning touch. Viola!
Don't forget that the 10%off special is on the entire Flourishes webstore thru Monday, Oct 13th. The code that is necessary to get the discount is RSC88 , place this in the promotion code box at checkout. Then send us an email at www.flourishesllccustomerservice@cox.net with the name of the designer that inspires you and we'll reward her with a tip....on our dime.
That makes it a wrap here in the Altier at Flourishes for today. I am so glad that you joined me. I truly appreciate your precious time to visit with us.
Ciao




No comments:
Post a Comment